

Bismarck: fateful decisions in the balance
After sinking HMS Hood there was disagreement over the next course of action
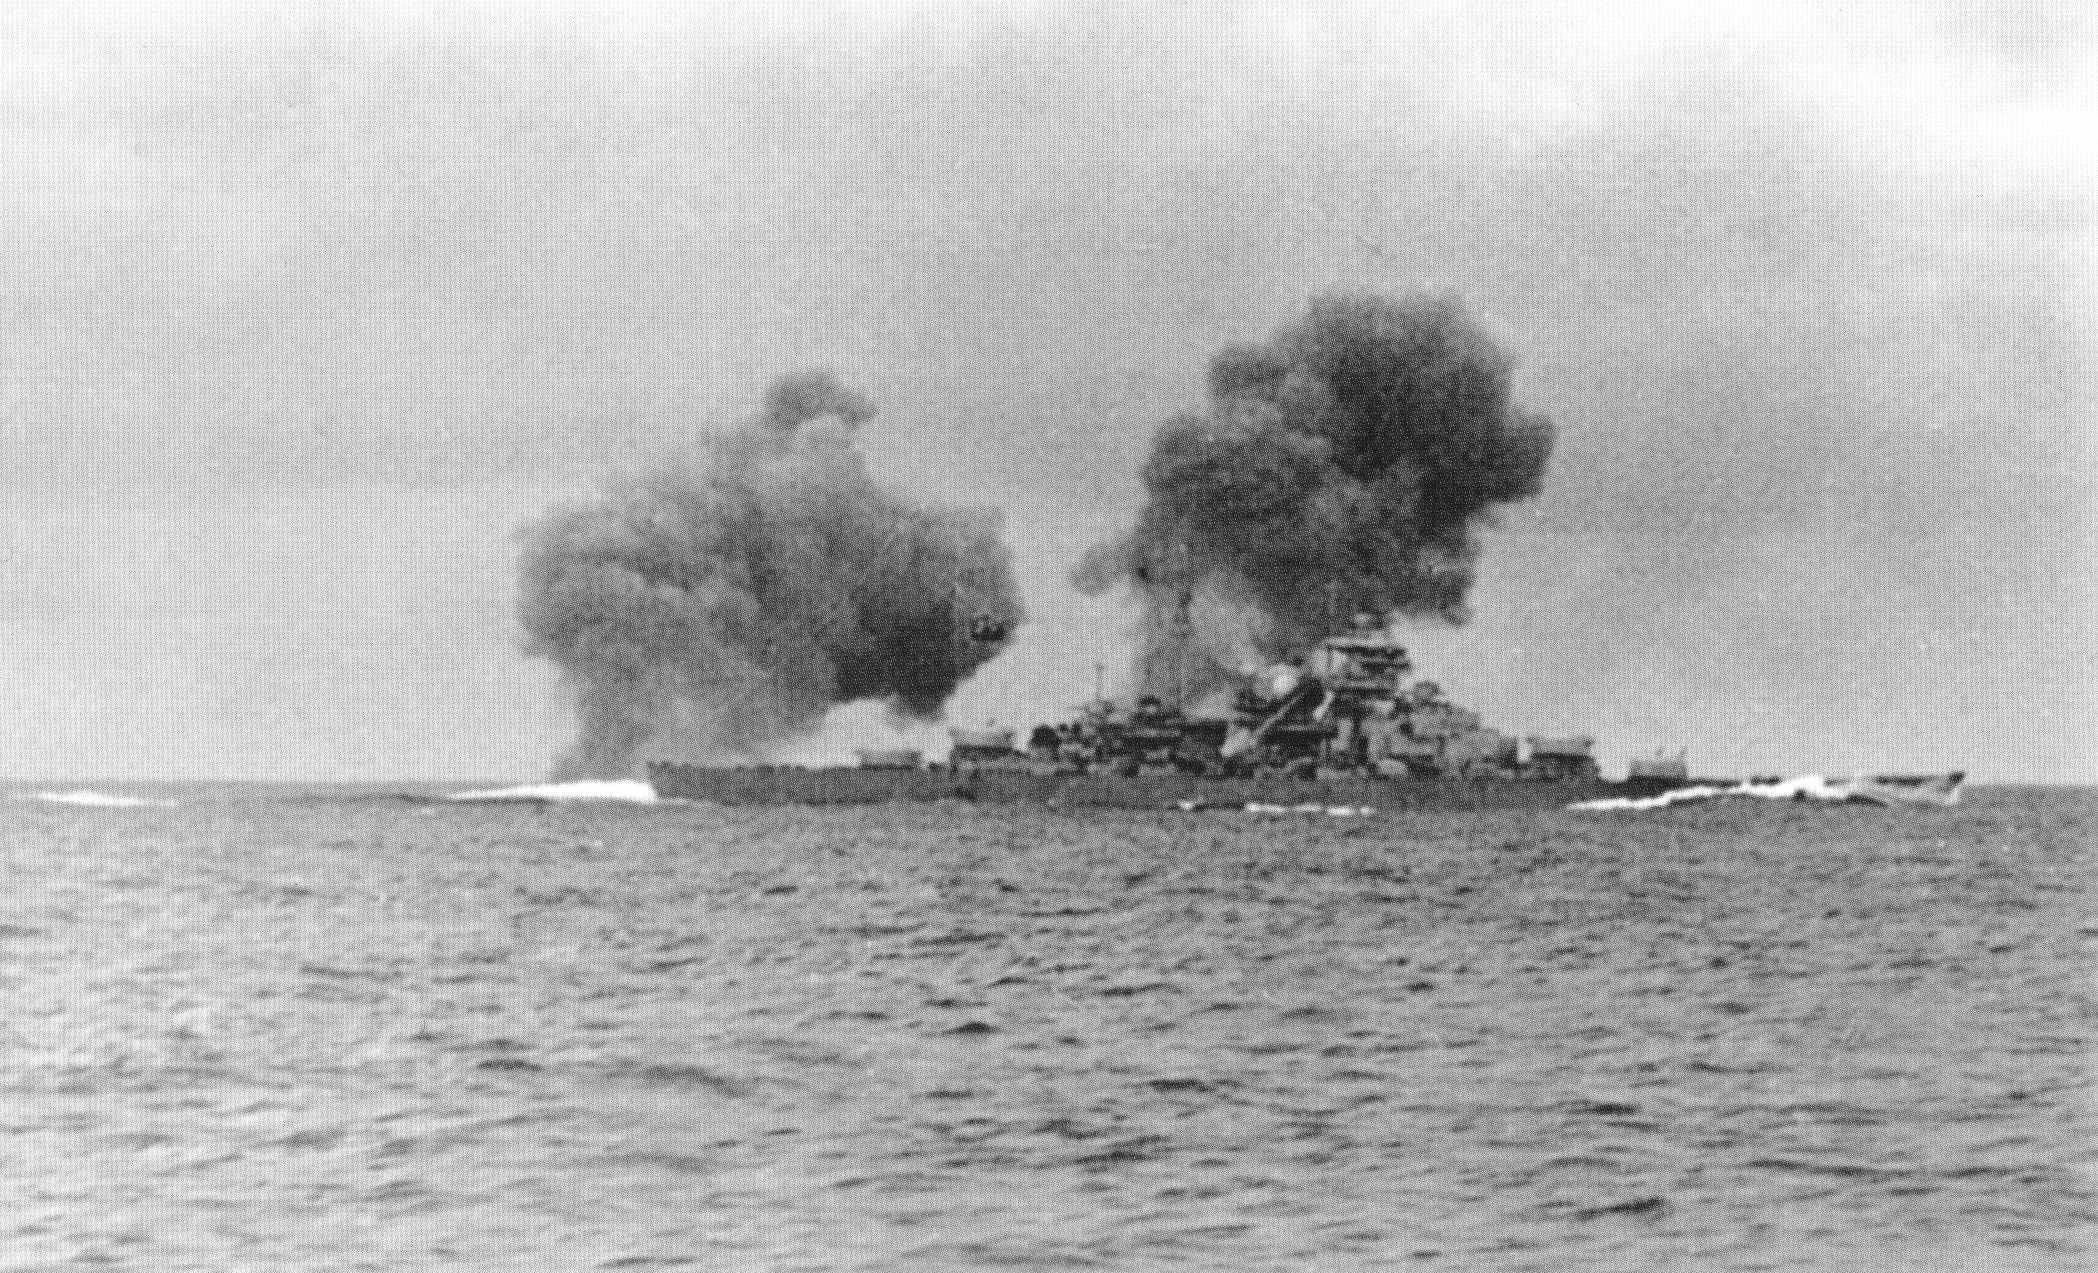
Bismarck had sunk the pride of the Royal Navy, HMS Hood and had damaged Britain’s newest battleship HMS Prince of Wales in her very first action. But she had been damaged herself and the action had revealed that the deployment of Royal Navy forces were not as the Germans had thought when they had set sail.
Admiral Lutjens, commanding the operation from Bismarck, now faced some difficult decisions. There were many competing considerations to take into account. It is likely that Captain Lindemann, captain of the Bismarck would have made different decisions. Whether taking another course would have led to a different outcome is highly debatable
The different factors weighing on Lutjens are explored in this extended excerpt from ‘Battleship Bismarck’:
After the battle of the Denmark Strait had concluded, Admiral Lutjens was forced to make some important decisions regarding his conduct of Operation Rheinubung. Bismarck had just sunk the premier warship in the Royal Navy and damaged her consort but did so at a cost. Bismarck received three hits, while the heavy cruiser was undamaged. Shortly after the battle ended, Admiral Lutjens met with his staff and with Captain Lindemann.
He pointed out that he had left Norway under the illusion that the British Home Fleet was in Scapa Flow and that to the best of his knowledge, the Royal Navy was unaware that his two ships were headed for the Atlantic Ocean. His first disappointment was being detected by Suffolk and Norfolk in the Denmark Strait. Despite rain, fog, or snow, their radar was able to keep track of his battle fleet. The final surprise came that morning with the appearance of HMS Hood and Prince of Wales, which he thought was King George V.
If other ships of what he believed was the Home Fleet were in pursuit, they too would probably be equipped with this more advanced radar. There was no safe haven in the Atlantic Ocean, but he also had to contend with battle damage to his flagship.
At this moment, Admiral Lutjens must have thought back to the meeting on 25 April that he had had with Rear Admiral Kurt Fricke, Admiral Raeder’s chief of operations. Fricke asked him what he would do if major forces of the Royal Navy should confront him. Liitjens replied, “I would immediately head for home.”
Now was the time for a real decision to be made: back to Germany or out to the Atlantic.
When the morning action had terminated, Captain Lindemann wanted to continue the battle and pursue the damaged British battleship. Lindemann pointed out that his gunnery officer, Commander Adalbert Schneider, had expended only ninety-three 380-mm shells in vanquishing his opponents, and sinking Prince of Wales would be a major triumph for the German navy. One survivor recalled that this discourse ended in an argument between Lutjens and Lindemann about breaking off the action with Prince of Wales.
Such a debate between an admiral and captain was contrary to tradition in the German navy, but Lindemann was a person who spoke his mind, despite his subordinate rank. This had been evident when Adolf Hitler visited Bismarck earlier that month. A fleet commander, such as Lutjens, had complete authority within his flagship.
The only evidence that gives credence to this supposedly argumentative exchange is that someone overheard an officer of the fleet staff tell Commander Oels over the phone that Lindemann tried to persuade Lutjens to pursue Prince of Wales. According to other reports that Lieutenant Commander von Mullenheim-Rechberg heard during the remainder of the mission, there was a heavy atmosphere on the bridge after the decision had been made to terminate any further action against Prince of Wales.
Admiral Lutjens probably made the argument that the primary mission of Operation Rheinubung was the destruction of merchant shipping and that enemy warships were to be engaged only when the primary mission made it necessary and it could be done without excessive risk. The morning battle could not have been avoided due to the aggressive approach of the two British capital ships.
Admiral Lutjens probably put forth a decisive argument that in any further action with two heavy cruisers and a slightly damaged bardeship in contact, his force was at a risk of more serious battle damage. The two cruisers were undamaged and posed a risk with their 203-mm guns and torpedo armament if an active pursuit of Prince of Wales continued.
There was danger that other units of the Home Fleet could be at sea; therefore, he was not going to take any further action but instead would adhere to the orders of Operation Rheinubung to avoid battle unless there was a good chance of success. That success was not guaranteed at this point of the mission.
To forestall such encounters, Bismarck turned closer to the ice limit where there were great ice floes. Prinz Eugen was ordered to take a position to the stern of Bismarck to track the three British pursuers.
With his suggestion on further action with Prince of Wales having been rejected, Captain Lindemann reportedly voiced the opinion that Bismarck should then return to Norway or Germany?
Admiral Lutjens told Lindeman that this mission was to be cruiser warfare. To maintain a threat to convoy shipping, he had to choose between battles with the odds heavily in his favour, accepting some risk of damage, or disengaging. Pursuit by the enemy with three ships in the area, including two with more sophisticated radar, would put the safety of an already damaged Bismarck at extreme risk. There was also the possibility that Prinz Eugen could be damaged during such an engagement.
Captain Lindemann allegedly did challenge the decision to head for France, telling Lutjens, “My ship should return to Bergen. Bismarck is too fine a ship to be risked in unequal engagements.” Lutjens retorted by telling Lindemann that by heading to France, he could be back at sea within a few weeks, perhaps even be joined by Scharnhorst and Prinz Eugen. Friction reportedly was also present between the staff and ship officers.
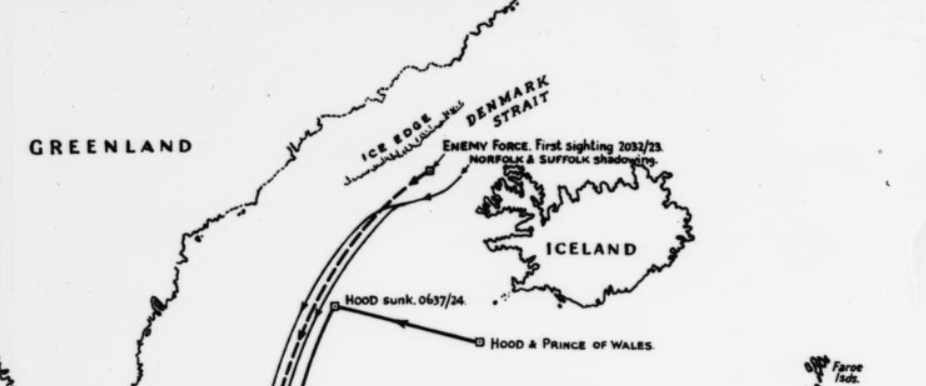
Quite possibly, there were more unknown pursuers to the east, based upon radio traffic being monitored by B-Dienst units on both the cruiser and the battleship. It was believed from these messages that the position, bearings, and speed of the German squadron were being broadcast to forces coming from the east. Based upon the call letters of Suffolk (K3G), Admiral Lutjens and his staff concluded that they had fought Hood and either King George V or Renown during the morning hours of 24 May and signaled the German naval command at 0632:
"Battleship, probably Hood sunk. Another battleship. King George V or Renown, damaged and turned away. Two heavy cruisers maintaining contact." With no acknowledgment from Naval Group North of this radio message, he sent a second message at 0705: “Have sunk a battleship in approximate position, quadrant 73 AD [63° 10' N, 32° O' W],”
The Germans never thought that one of their opponents could be the brand-new Prince of Wales exposed to the risk of battle with so little training and workup time. It was also believed from Luftwaffe sighting reports (later proven to be disastrously in error) that the major elements of the Home Fleet were in Scapa How as late as 21 May.
It was clear to Admiral Lutjens that battle damage to his ship and flawed German intelligence concerning radar and air reconnaissance had seriously jeopardized his mission. The Luftwaffe reconnaissance that reported units of the Home Fleet in port was clearly wrong. The effectiveness of their radar was confirmed when the two British cruisers were able to maintain contact throughout the night in bad visibility, providing information that had led heavy units into action with his task force and endangered the refueling of Prinz Eugen.
While Captain Lindemann and Admiral Liitjens debated the future course of action for the German battleship, there was great jubilation on board Bismarck when an announcement was made over the loudspeakers that the Hood had been sunk. The crew felt that the Germans’ most dangerous adversary had been eliminated.
An “all clear” was sounded on the German ships at 0830, allowing weary crews that had been at action stations for over twelve hours to relax a little. On Bismarck, off-duty officers gathered in the officers’ wardroom to toast the gunnery officer, Commander Schneider, on his sinking of Hood. Champagne toasts were made, but no one present was aware of the seriousness of the ongoing damage control efforts being made below or that this was to be the last time such a gathering would take place under low-stress conditions.
Aboard Prinz Eugen, Captain Brinkmann was relieved that his ship had no battle damage, but he was becoming increasingly concerned with his fuel situation. The mood of his crew was jubilant. The crew from turret Anton called the gunnery officer, Commander Jasper, on the telephone so he could hear them playing his favorite dance tune on a phonograph.
Ever since leaving the island of Rugen, there had been problems synchronizing the speed of the two ships based on their propeller revolutions. At full load, Bismarck made her predicted speed according to her trial data. Prinz Eugen always had to proceed at one knot less than her speed predicted for her full-load displacement to keep up with Bismarck. After the battle of the Denmark Strait, the difference became two knots; Bismarck was making less speed due to battle damage. This speed problem only made it clearer to both Captain Brinkmann and Admiral Lutjens that certain dangers lay ahead with more enemy heavy forces and a concentrated attack on the German squadron.

Decisions by Admiral Lutjens
In dealing with current situation and continuance of the mission, Admiral Lutjens had to consider two main points, now knowing that information about the disposition of the Home Fleet in Scapa Flow was wrong after die appearance of Hood. First, the shell damage in the bow and outside the forward port boiler room, along with flooding in boiler room number two (compartment XIII) and electrical generation station number four (compartment XIV), created serious operational problems for Bismarck. Second, continuation of the mission to the south would allow the opportunity to detach Prinz Eugen to continue cruiser warfare, while Bismarck could draw British forces away from the heavy cruiser and toward a concentration of U-boats.
Admiral Lutjens decided that the strategic situation was clear; he must try to avoid further action as his ship had sustained some serious flooding, damage, and some loss of mobility and was losing fuel. He did not have a full report of battle damage that might force him to seek a port for repairs. Two undamaged and still battle-worthy British heavy cruisers were following close astern, and King George (really Prince of Wales) was still to the east out of range. Their presence and continuing pursuit made return to Norway impossible.
The unexpected appearance of Hood and Prince of Wales that morning was a clear indication that other units of the Home Fleet probably were also at sea to the east and closing his position now that his location was known. His primary concern was whether a carrier was among those ships searching for him.
He now had to devise a new plan of action because a serious problem was developing with the fuel situation aboard Prinz Eugen. Based upon reports he was receiving from Captain Brinkmann, the cruiser had been using a great amount of fuel during this high-speed chase over the last eleven hours and needed to be refueled within thirty-six to forty-eight hours. With British forces in close pursuit, underway replenishment could not be accomplished from Bismarck. With her reserve fuel tanks not serviceable, Bismarck was no longer in a position to refuel the cruiser even if contact were broken. One of the oilers already stationed in the North Atlantic would have to refuel Prinz Eugen.
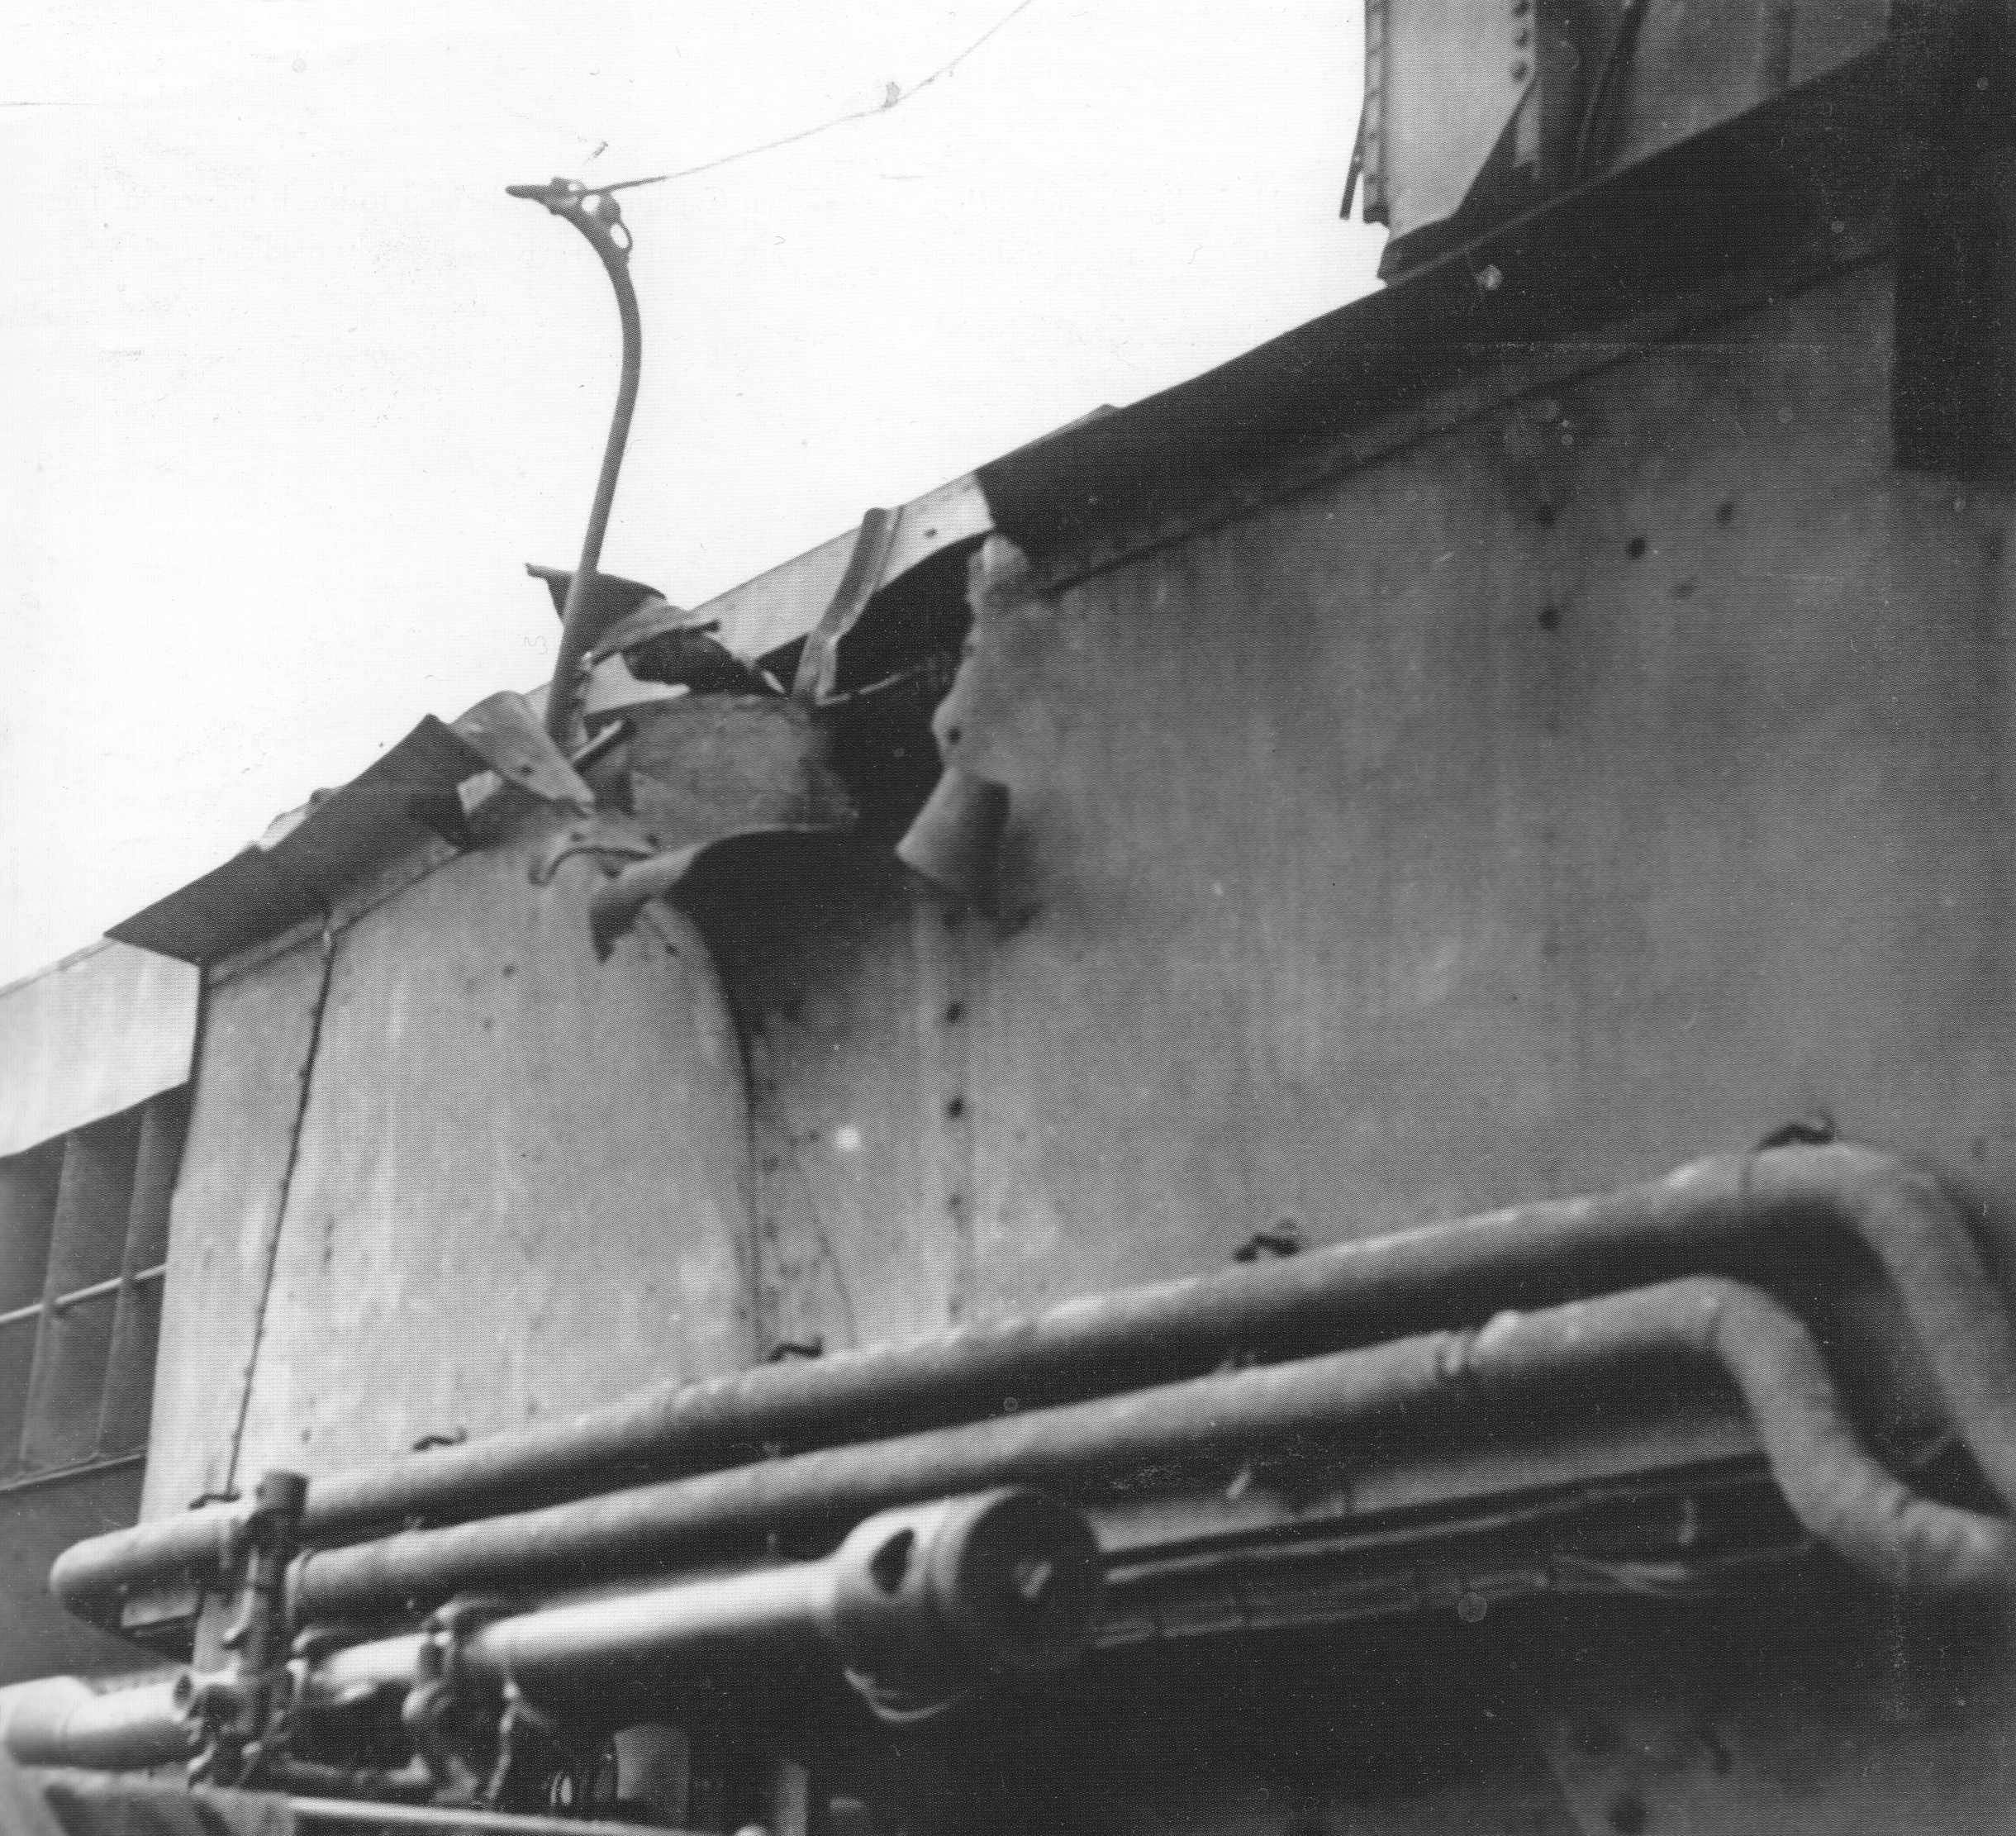
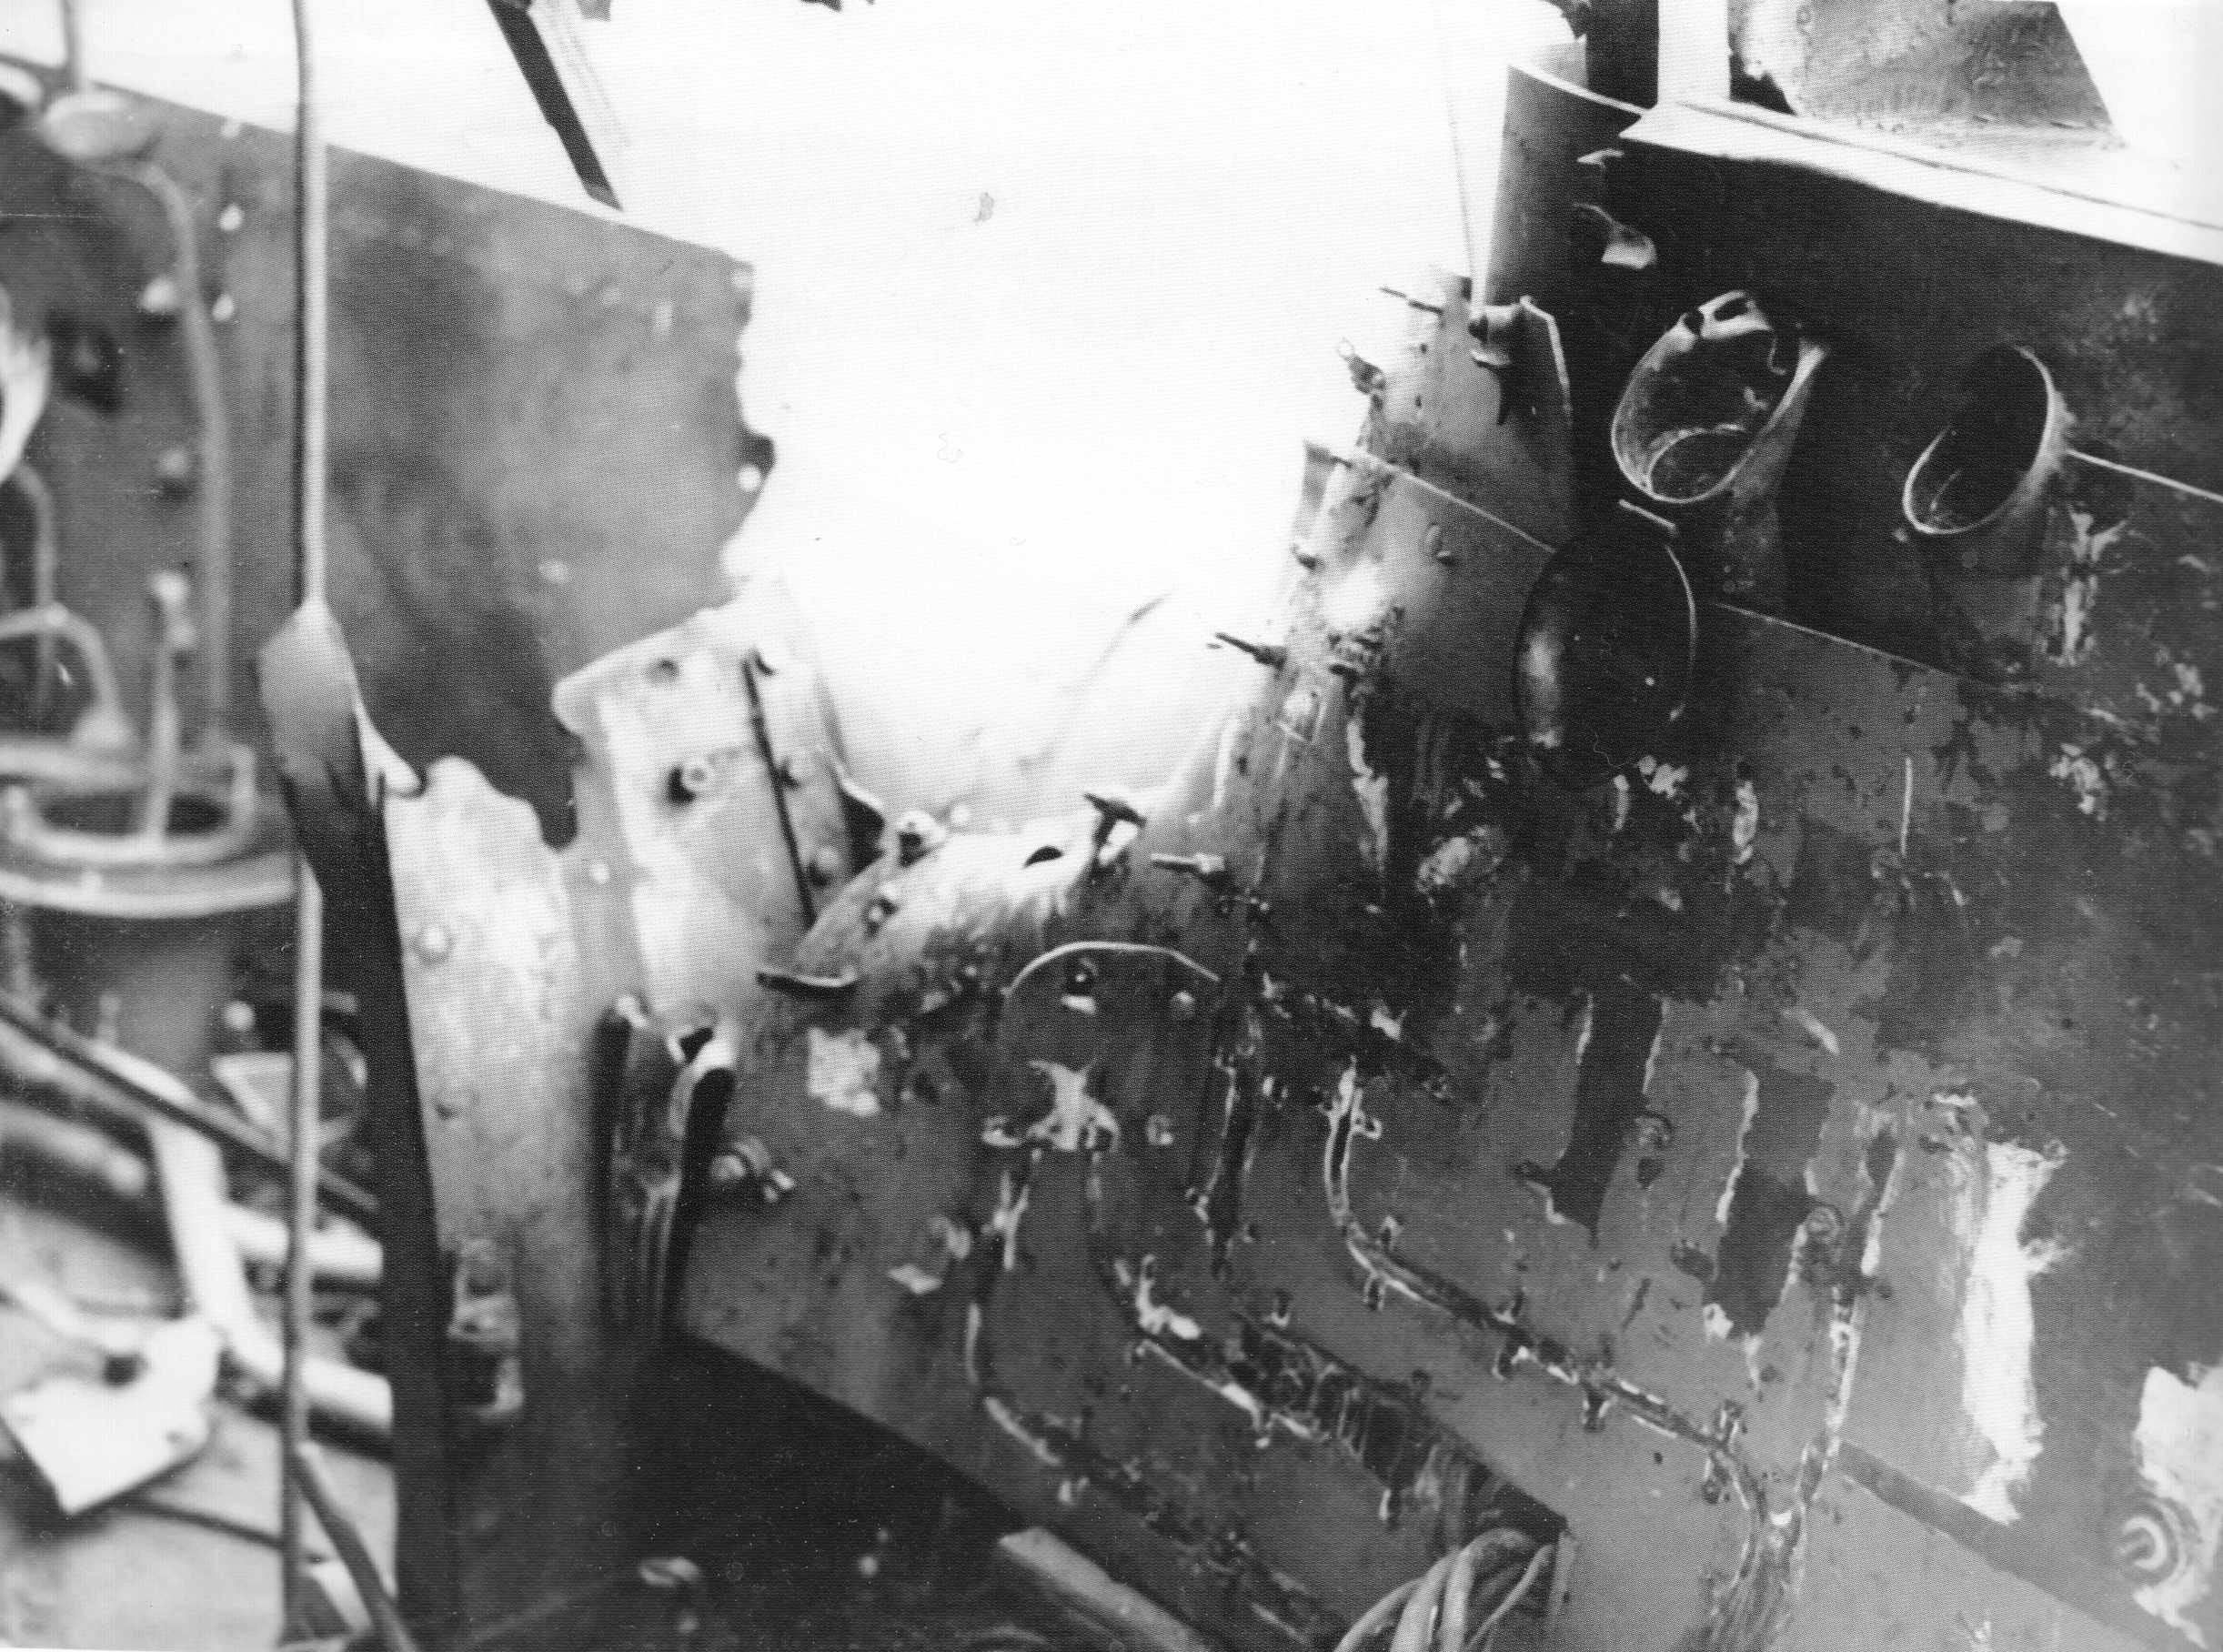
The preliminary report from damage control indicated that shipyard repairs would be required for the two areas of hull damage. The fuel situation aboard Bismarck was also serious, as the forward reserve fuel tanks could not be used due to the inaccessibility of the fuel pumps, manifolds, and piping. A substantial amount of fuel was still leaking into the sea from the shell hit below the bridge, making detection and pursuit of the ship easier for the enemy. The outflow of oil could not be checked unless divers were sent below. The sea conditions and the proximity of British forces precluded that operation.
Fleet engineering officer Dr. Karl Thannemann, who had been the chief engineering officer of the ill-fated heavy cruiser Blucher, and Commander Walter Lehmann were going over the fuel situation. Each supervised a team of men assigned to take soundings of all the operational fuel tanks. Tanks in the forecasde could not be accessed due to flooding on the Batteriedeck and the deck below. Whether the fuel tanks affected by the shell hit were sounded is not known.
Captain Brinkmann in Prinz Eugen was ordered to do the same. The fuel report that came later from Prinz Eugen was discouraging. At 0801, Liitjens decided to abort Operation Rheinubung, reporting to German shore-side commands on damage to his flagship:
“Two heavy hits. One in Compartments XIII—XIV with the loss of electrical station 4; port boiler room is taking water, which we can control. Second hit compartment XX-XXI in the forecasde. Shell entered port, exited starboard above armor deck. Third hit on a boat, of no concern. Denmark Strait 50 nautical miles wide. Drifting mines. Enemy has radar. Intentions: Enter St. Nazaire. Sea God [code for Prinz Eugen] cruiser war. No casualties.”
At this point, Lutjens had given up any idea of returning to Norway despite the fact that it was closer than the French coast. He would have had to evade the two cruisers and one damaged battleship; there was also the potential problem of unexpected encounters with other units of the Home Fleet, especially aircraft carriers and aircraft attacks.
Including the effects of the counterflooding to correct list and trim, there were some 1,500 to 2,000 tonnes of seawater in Bismarck from various sources.10 This flooding, coupled with the loss of fuel oil due to seawater contamination and a disabled boiler, meant there would not be sufficient speed to outdistance her pursuers under the present conditions.
The radar in the pursuing British cruisers proved to be remarkable in tracking the German squadron in fog, snow, and rain. The only option left was to lose them in the vastness of the Atlantic Ocean by maneuvering under the cover of darkness, which in these latitudes would occur during the early morning hours of 25 May. If he steamed farther south, this would provide a longer night period and make it easier to lose them. A course to the south also would keep a safer distance between his ships and any other pursuers from Scapa Flow.
‘Battleship Bismarck, A Design and Operational History’, published by the Naval Institute Press and Seaforth Publishing in 2019, is a magnificent volume, a valuable attempt to tell the whole story of the Bismarck in one volume. Probably every relevant image of the Bismarck has been collected together here and reproduced on high quality paper, alongside many charts and diagrams. The whole story is told in some detail, as can be judged from the excerpt above. The original thinking about new battleships for the Kriegsmarine and how she was designed, are explored, providing a full context to her deployment. The account is taken right through to modern times with a number of photographs from James Cameron’s 2002 undersea exploration of the wreck, with accompanying analysis of the damage to the ship. The human story is by no means neglected, with a a whole appendix devoted to ‘Survivors Reports’.
For students of naval warfare this will be a very desirable volume to acquire, even if they probably have several other books on the Bismarck. But it will also be of interest to the general reader. It is a weighty volume but is by no means just a coffee table book. It tells the story well and does ample justice to this fascinating episode.