

'Battleaxe'- Disheartening British counter-attack
A valiant attempt to attack with new British tanks comes to grief
After the British first encountered the Germans in North Africa it had been quickly realised that they faced an entirely different enemy to the Italians. More and better tanks were amongst the immediate requirements to even up the odds. Churchill demanded and got a convoy of tanks shipped out to Egypt.
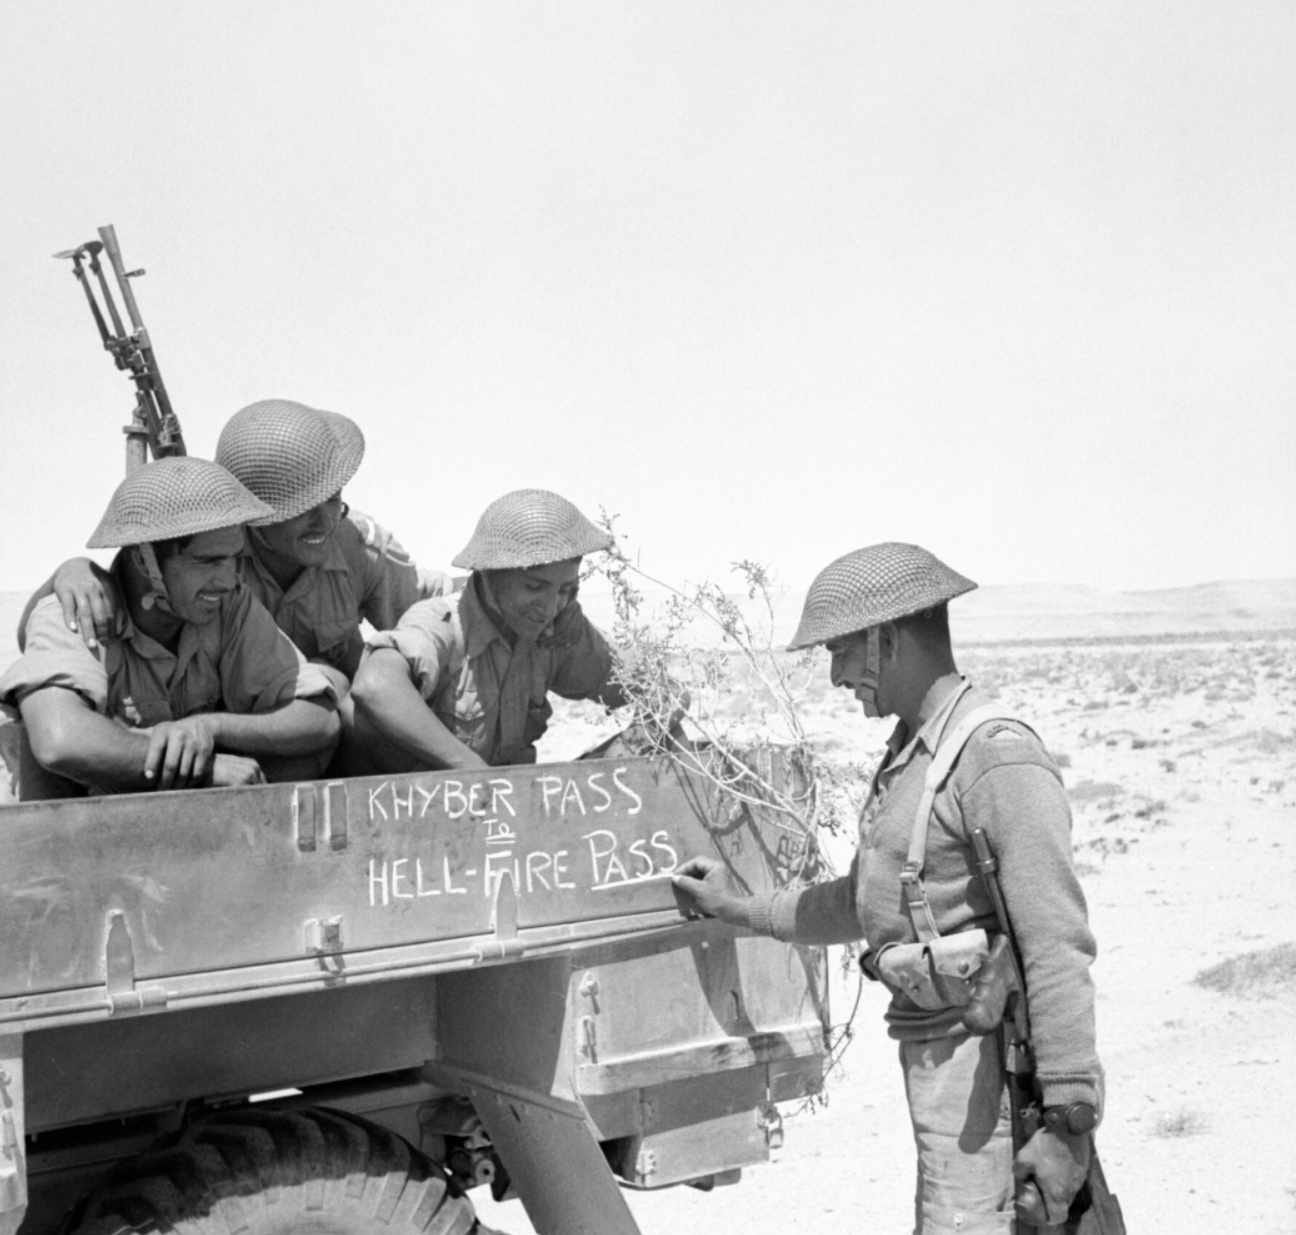
Once they arrived there was pressure to see them launched into battle quickly. The unfortunate consequences were described by Cyril Joly on 15th June.

Anthony Tucker-Jones describes ‘Operation Battleaxe, the British attack intended to push west to relieve besieged Tobruk in Allied Armour 1939-1945 : British and American Tanks At War :
Lieutenant General Sir Noel Beresford-Peirse was placed in command, with the 7th Armoured and 4th Indian Divisions acting as his strike force, though both lacked a brigade each.
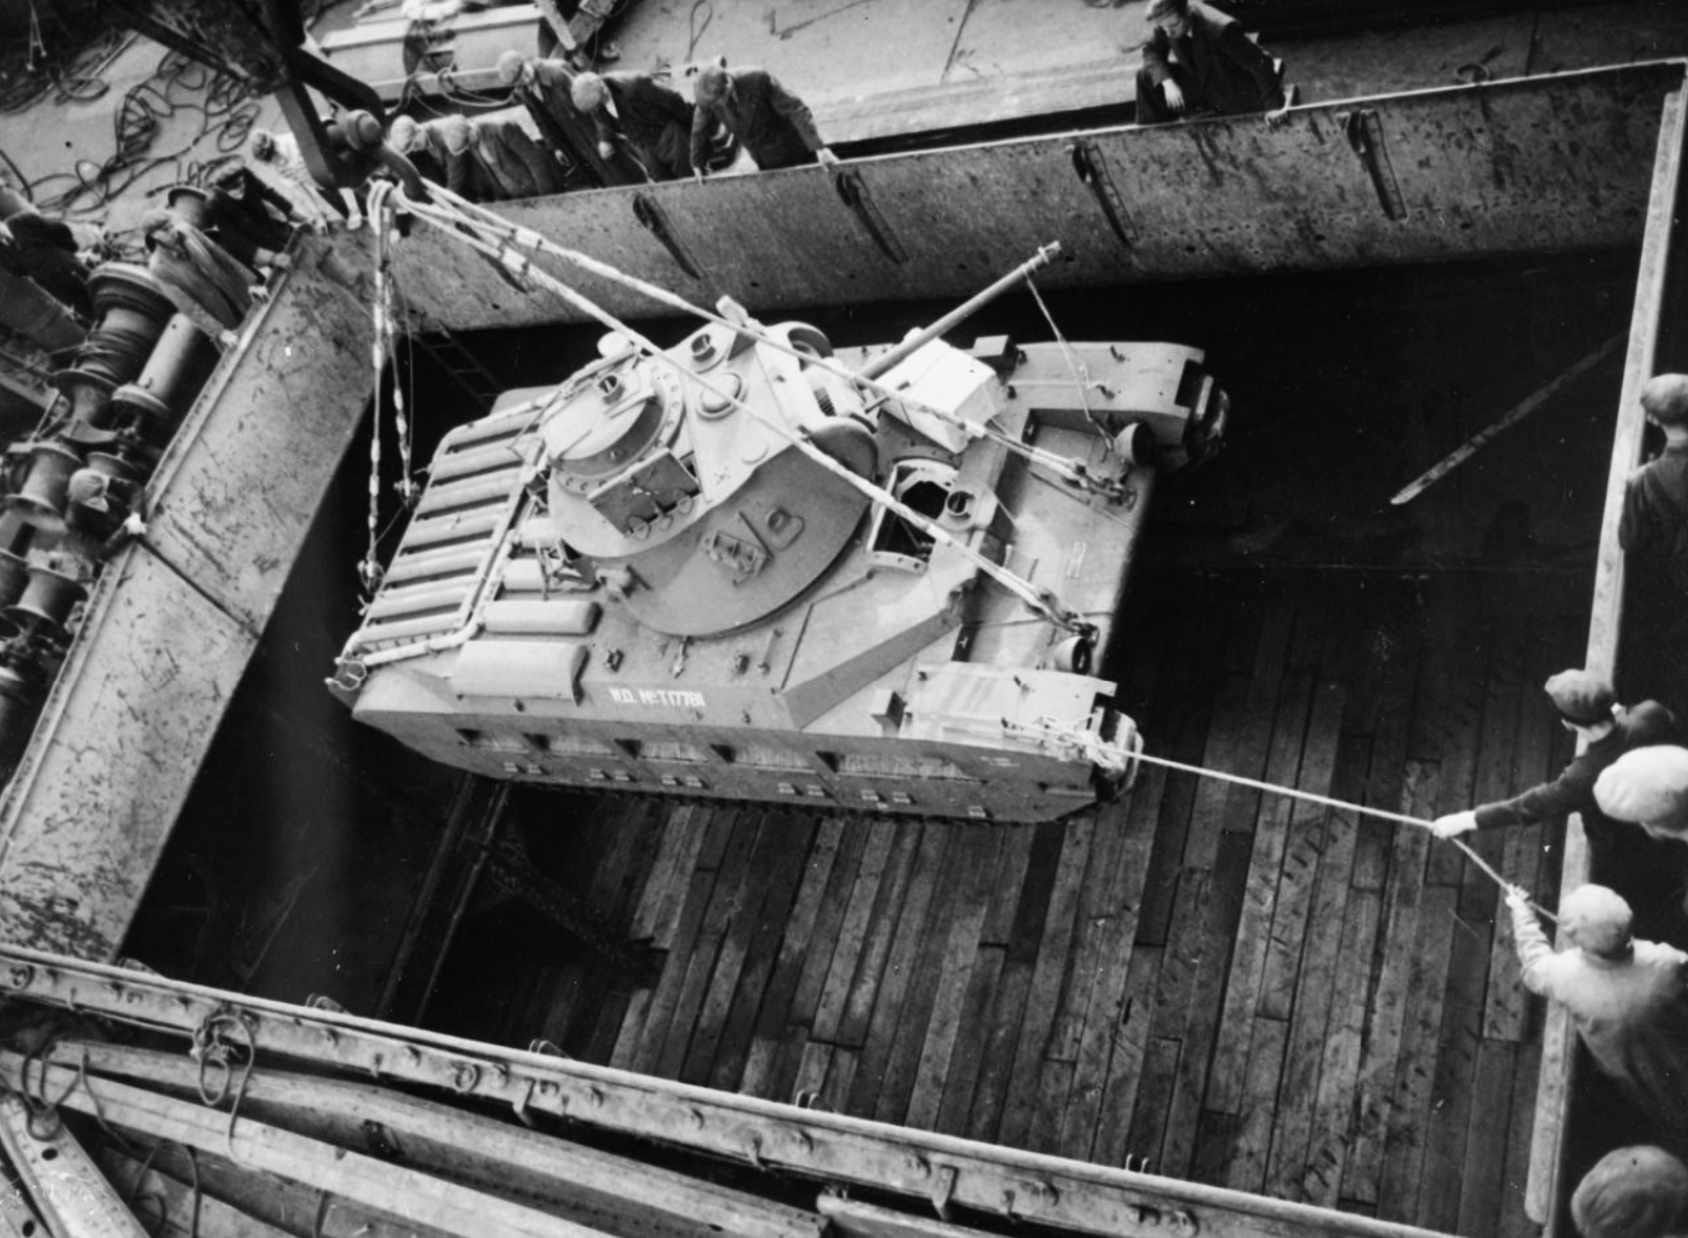
The latter was to push along the coast through Halfaya toward Sollum and Capuzzo. The 7th Armoured comprised the 4th and 7th Armoured Brigades - the former had two regiments, 4RTR [Royal Tank Regiment] and 7RTR, equipped with Matildas, while the latter’s 2RTR had to make do with inadequate A9, A10 and A13 cruiser tanks, which although old designs were recently delivered new builds, and the 6RTR was issued with the Crusaders. Ninety-eight Hurricanes and Tomahawks as well as over 100 bombers supported the ground forces.
In Battleaxe Churchill’s ill-prepared ‘Tiger Cubs’ were thrown perhaps recklessly into action on 15 June with the intention of overwhelming Rommel. Lieutenant Colonel Walter O’Carroll, commander 4RTR watched the attack on Halfaya Pass go in,
‘The sun was rising behind and light forward was excellent. No guns sounded. The tanks crept on. At Halfaya the month before, Major Miles had found the enemy still in bed or shaving when he arrived, but they were Italians. Now it seemed almost too good to be true that the [German] garrison should be so caught again'
He was right. At 0600 hours Rommel’s 88mm guns opened and all but one of thirteen Matildas went up in flames and the attack along the top of the escarpment collapsed. At the bottom of the pass six tanks of A Squadron 4RTR ran into a minefield and four blew up, blocking in the survivors. The attack on the pass ended in a confused shambles. 7RTR reached Capuzzo only to lose five Matildas to German counter-attacks, with another four damaged.
The 2RTR attacked, with 6RTR’s Crusaders held back for a surprise blow, but both were bested to the west at Hafid Ridge. Two A9s were lost to German 88mms: equipped only with solid shot there was nothing they could do against the dug-in anti-tank guns. To the south a flanking attack failed and five tanks were lost after they could not be recalled for the lack of radios. The Crusaders were then thrown in and ran straight into a German gun line, losing eleven tanks immediately and another six damaged. Others simply broke down. In the face of over thirty panzers and failing light the rest withdrew.
By the end of the day of the 100 Matildas committed to the battle only 37 remained operational, although the mechanics had another 11 battleworthy by the following day. It was discovered that 7th Armoured Brigade had lost half its tanks, while 2RTR had twenty-eight tanks and 6RTR some fifty remaining. Disastrously for Beresford-Peirse, he had lost half his tanks without even bringing Rommel’s main panzer force to battle.
Rommel though was feeling the pressure. Having lost Capuzzo, he had men isolated at Halfaya, suffered casualties along Hafid Ridge and lost Point 206. He must have been very reassured by the reports filtering in that the surrounding landscape was littered with knocked-out and broken down British tanks.
Also a panzer battalion from the 5th Light Division had just arrived at Hafid Ridge and the rest of the division was en route. Similarly, the 15th Panzer Division had yet to fully commit itself to the fight, its artillery and anti-tank units having borne the brunt of most of the British attack. Those panzers involved around Capuzzo had been used solely to lure the ‘Tiger Cubs’ onto the waiting anti-tank guns.
Lieutenant Heinz Werner Schmidt accompanied Rommel to view the battle recalling,
It was bonny fighting that we saw. Wavell’s tanks broke into a number of infantry positions, despite the intensive fire from our 88mm guns, which they had scarcely expected to meet. The crews manning the 88’s sat high up and unprotected at their sights. When one man fell, another of the crew took his place. ... despite the heavy losses caused by the artillery, the British infantry with rare gallantry pressed forward across the Halfaya wadis.
By the afternoon of 16 June the 6RTR had withdrawn to the frontier with just ten operational Crusaders. The panzers launched another attack at 1900 and rolled over 6RTR and 2RTR, only the onset of darkness saved them from compete annihilation. The following day, massing his panzers, Rommel struck west of Sidi Suleiman reaching the town at 0600 hours. The Matildas withdrew from their exposed position at Capuzzo and a six-hour battle followed. Battleaxe had been stopped in its tracks and the Germans were left in possession of the battlefield.
Rommel witnessed, ‘Great numbers of destroyed British tanks littered the country through which the two divisions had passed.’
‘Thus the three-day battle of Sollum was over,’ observed Rommel, ‘It had finished with a complete victory for the defence, although we might have dealt the enemy far greater damage than we actually had done. The British had lost in all, over 200 tanks and their casualties in men had been tremendous. We, on the other hand, had lost about twenty-five tanks totally destroyed.’
In fact, according to British figures, sixty-four Matildas were lost along with twenty-seven cruiser tanks, though more Crusader tanks fell into German hands due to mechanical troubles than through battle damage.
Although the Crusader was under-gunned, Rommel was quite impressed by it, noting,
‘Had this tank been equipped with a heavier gun, it could have made things extremely unpleasant for us.’

This excerpt appears by kind permission of the publisher, Pen & Sword Books Ltd, copyright remains with author. N.B. The images above are not from this book.
Allied Armour 1939-1945 : British and American Tanks At War (2020) is a one volume overview of the role of tanks in every theatre where the Allies fought. It traces the story from the early failure of British tanks through to the arrival of the American Grants and Shermans that helped change the parity of forces until the eventual arrival of better British tanks in 1944. It does include a chapter on tanks in the Pacific but some may feel that there is too much emphasis on the British perspective. A good introduction to the role of armour for the general reader but tank enthusiasts will probably be looking for more detail.
A more detailed analysis of British tank failings can be certainly be found in Dick Taylor’s The Second World War Tank Crisis. This is a thoroughly researched study that examines every aspect of why the British got it so wrong in the early years of the war despite having invented the tank to break the impasse of trench warfare in the First War. The following excerpt relates to the Crusader tank:
The A15 Crusader
Despite a persistent myth, the Crusader was a contemporary of, and not a development from, the Covenanter. On 13 April 1939 Nuffield was asked to take the lead on the development of a new heavy cruiser, given the project number A15 and later named the Crusader - an earlier option rejected was to call it the Python. The first contract for one pilot (A15E1) plus 200 tanks was issued on 27 June 1939, nine weeks before the outbreak of war.
Despite a desire to use a new Meadows engine common with the LMSR Covenanter, NMA, led by its aggressively focused William Morris, now Lord Nuffield, refused and insisted on using the old, tired Liberty design that the firm possessed the license for. There is no doubting Nuffield’s patriotism or his generosity, but he was determined to run his companies according to his own rules, and frequently clashed with the War Office; when confronted by this extraordinary personality, the WO generally backed down and decisions were made that they often came to regret. However, there is some suggestion that the WO originally wanted NMA to build Covenanters, but it refused, leading to the design of the Crusader; if true, then we must applaud Nuffield, as the Crusader gave valuable if flawed operational service.
The A15 was built around the 27-litre Liberty petrol engine, developing a nominal 340bhp. Designed for aircraft, it had been first used as a tank engine in the Mk VIII design of 1918, and of course was already in service in the A13. For some reason, possibly to simplify production when the A13 was replaced by the new tank, Nuffield was completely wedded to the engine, although it was to become regarded as the weakest part of the tank, as we shall see. The Christie suspension was adopted, but with the inclusion of a fifth roadwheel pair which helped to take the weight and reduce ground pressure.
The design was marred by the inclusion, once more, of a BESA MG subturret on the front of the hull, which came with all of the problems already known to be associated with it. Fortunately, after a short time in action common sense prevailed and the monstrosity was removed from production during the building of the Mk II version, following the practice of crews in the desert who had already taken some of them off. This created more space for ammunition stowage at the loss of some weight and no efficiency.
The turret was the three-man two-pounder armed design from NMA, also used with some detail differences on the Covenanter. This featured sloping sides, as that way the armour specification could be met by using thinner plates set at an angle. Unfortunately, this design created shot traps on the underside, leading to enemy fire being deflected into the vulnerable turret ring area. Many British reports from actions in North Africa were later to refer to jammed turrets and guns, or worse, and led to the adoption of a slab-sided turret on the A24/A27 tanks.
The single mild-steel pilot, A15E1, was completed by NMA and arrived at MEE for trials on 9 April 1940, a month before the first turretless Covenanter, despite a later start. The first production contract for 200 Mk I Crusader tanks had already been issued concurrently, another drawing board order. Nevertheless, in some ways the Crusader was a workmanlike design, certainly at the time of its operational debut with 6RTR in June 1941.
True, it was under-gunned, as the Germans had started to field the 50mm gun on its Panzer III tanks, and also under-armoured, at a 40mm basis constructed using composite plates as on the Covenanter. But it was fast and agile, with a low silhouette and the advantages that the three-man turret conferred, despite lacking a commander’s vision cupola for closed-down use. It was certainly an improvement over the A9, A10 and A13 tanks that armoured regiments had been used to until that point, even though it was nearly 5 tons heavier than the A13 and thus not as fast, with an officially governed top road speed of 27mph.
However, the Liberty engine, insisted on by Nuffield, was to cause endless problems and gave the Crusader a deserved reputation for unreliability. On the face of it the engine was a good choice, with nominal 340bhp on tap for a tank weighing around 20 tons, which should give a power to weight ratio of 17:1, a very reasonable figure. However, what was not widely appreciated at the time was that this figure did not represent the real power available, as a lot of horsepower was actually used up in ancillary operations including cooling the engine.
Typically, a Liberty engine needed nearly 18 percent of the nominal power just to cool itself. But the real problem was reliability. The construction of the Liberty was at fault, as each of the twelve cylinders was individually made of cast-iron and then bolted together; when moving at speed over rough terrain the engine would tend to work itself apart, fracturing the oil galleries and causing leaks that invited sand into the engine.
Cooling was also inadequate for the desert, as sand was able to get into the system and caused frequent coolant pump failures which immobilised the tank. The exposed engine valves and chain-drive for the cooling fans also wore rapidly due to sand ingress. The air-cleaners for the engine were mounted on the rear trackguards, just the place where the tank, despite its sand shields, would produce the most dust. These had been changed from a concertina filter type to an improved oil-bath design, but they were still positioned badly; each air cleaner could collect as much as eight pounds of dust an hour. It was only as a result of such experience that it became fully apparent that air-cleaners functioned best by being inside the engine compartment, and better still, that drawing air in through the turret acted as a first stage of filtration, prolonging filter and thus engine life.
To make matters worse, on arrival in Egypt the tanks suffered from the same problems as already noted for Covenanter, with inadequate shipping methods and instances of tanks being driven round the docks with no coolant in the system. One shipment of forty-one tanks that arrived in February 1943, many months after the first complaints had been raised, had not a single tank that was fit for use. Thirty of them required up to 300 man-hours of work to put right - providing of course that the spares were available. The other eleven needed between 300 and 500 hours. (Bearing in mind that the official NMA figures for building a new Crusader from scratch in 1943 was 6,050 man-hours, these figures are truly awful.)
...
In an attempt to improve the protection on the tank the Crusader Mk II was introduced during 1941 with a modest 6mm increase to the nose and 10mm on the turret front to bring it up to a maximum standard of 50mm; many Mk IIs were also built without the MG turret, although this was not an official part of the upgrade at first. Additional applique armour panels were also produced that field workshops could fit on the glacis of the tank and were mainly used on the later Mk III.
The one feature of the Crusader that prolonged its service life for a while was that the turret ring was large enough - just - to allow a 6 Pounder gun to be mounted as the Mk III. The anticipated early appearance of the 6 Pounder-armed A24 Cavalier led to a delay in the decision on up-gunning the Crusader, but when it became clear that the Cavalier was not going to be ready as soon as had been hoped, the Crusader Mk III was produced instead. The development of this started in September 1941, with Nuffield once again rejecting the official scheme offered to them and producing a design of their own, still using 50mm of armour.
Although it looked similar to the earlier version, the turret had to be enlarged and despite this, the larger gun and ammunition meant that there was now only room for two men, with all the control problems that brought. In most regiments therefore the troop leader continued to operate from a Mk I or II for reasons of command and had to forego the advantages of a good tank-killing gun.

This excerpt appears by kind permission of the publisher, Pen & Sword Books Ltd, copyright remains with author.
As may be judged from the above passage The Second World War Tank Crisis is very much one for the tank enthusiast.
It has an importance wider than that however. Understanding why the British Army was held back by the limitations of its equipment is crucial. This is a key part of the jigsaw in understanding the overall performance of British forces in the first half of the war. Rommel was rapidly gaining mythical status as a military genius and was set to provide many more upsets in the desert. Yet had the Crusader arrived in May 1941 with the 6 pounder gun that it received just a few months later, things might have been very different.