

'Target Corinth Canal 1940-44'
26th April 1941: German airborne troops attempt to seize the bridge over the Corinth Canal
The Corinth Canal lies between the Greek mainland and its southernmost peninsula. It occupied a strategically important location for Axis ships headed for Athens. In April 1941, it also blocked the German invasion forces chasing after Allied forces in Greece, and they launched an airborne raid to capture the only bridge over the Canal intact.
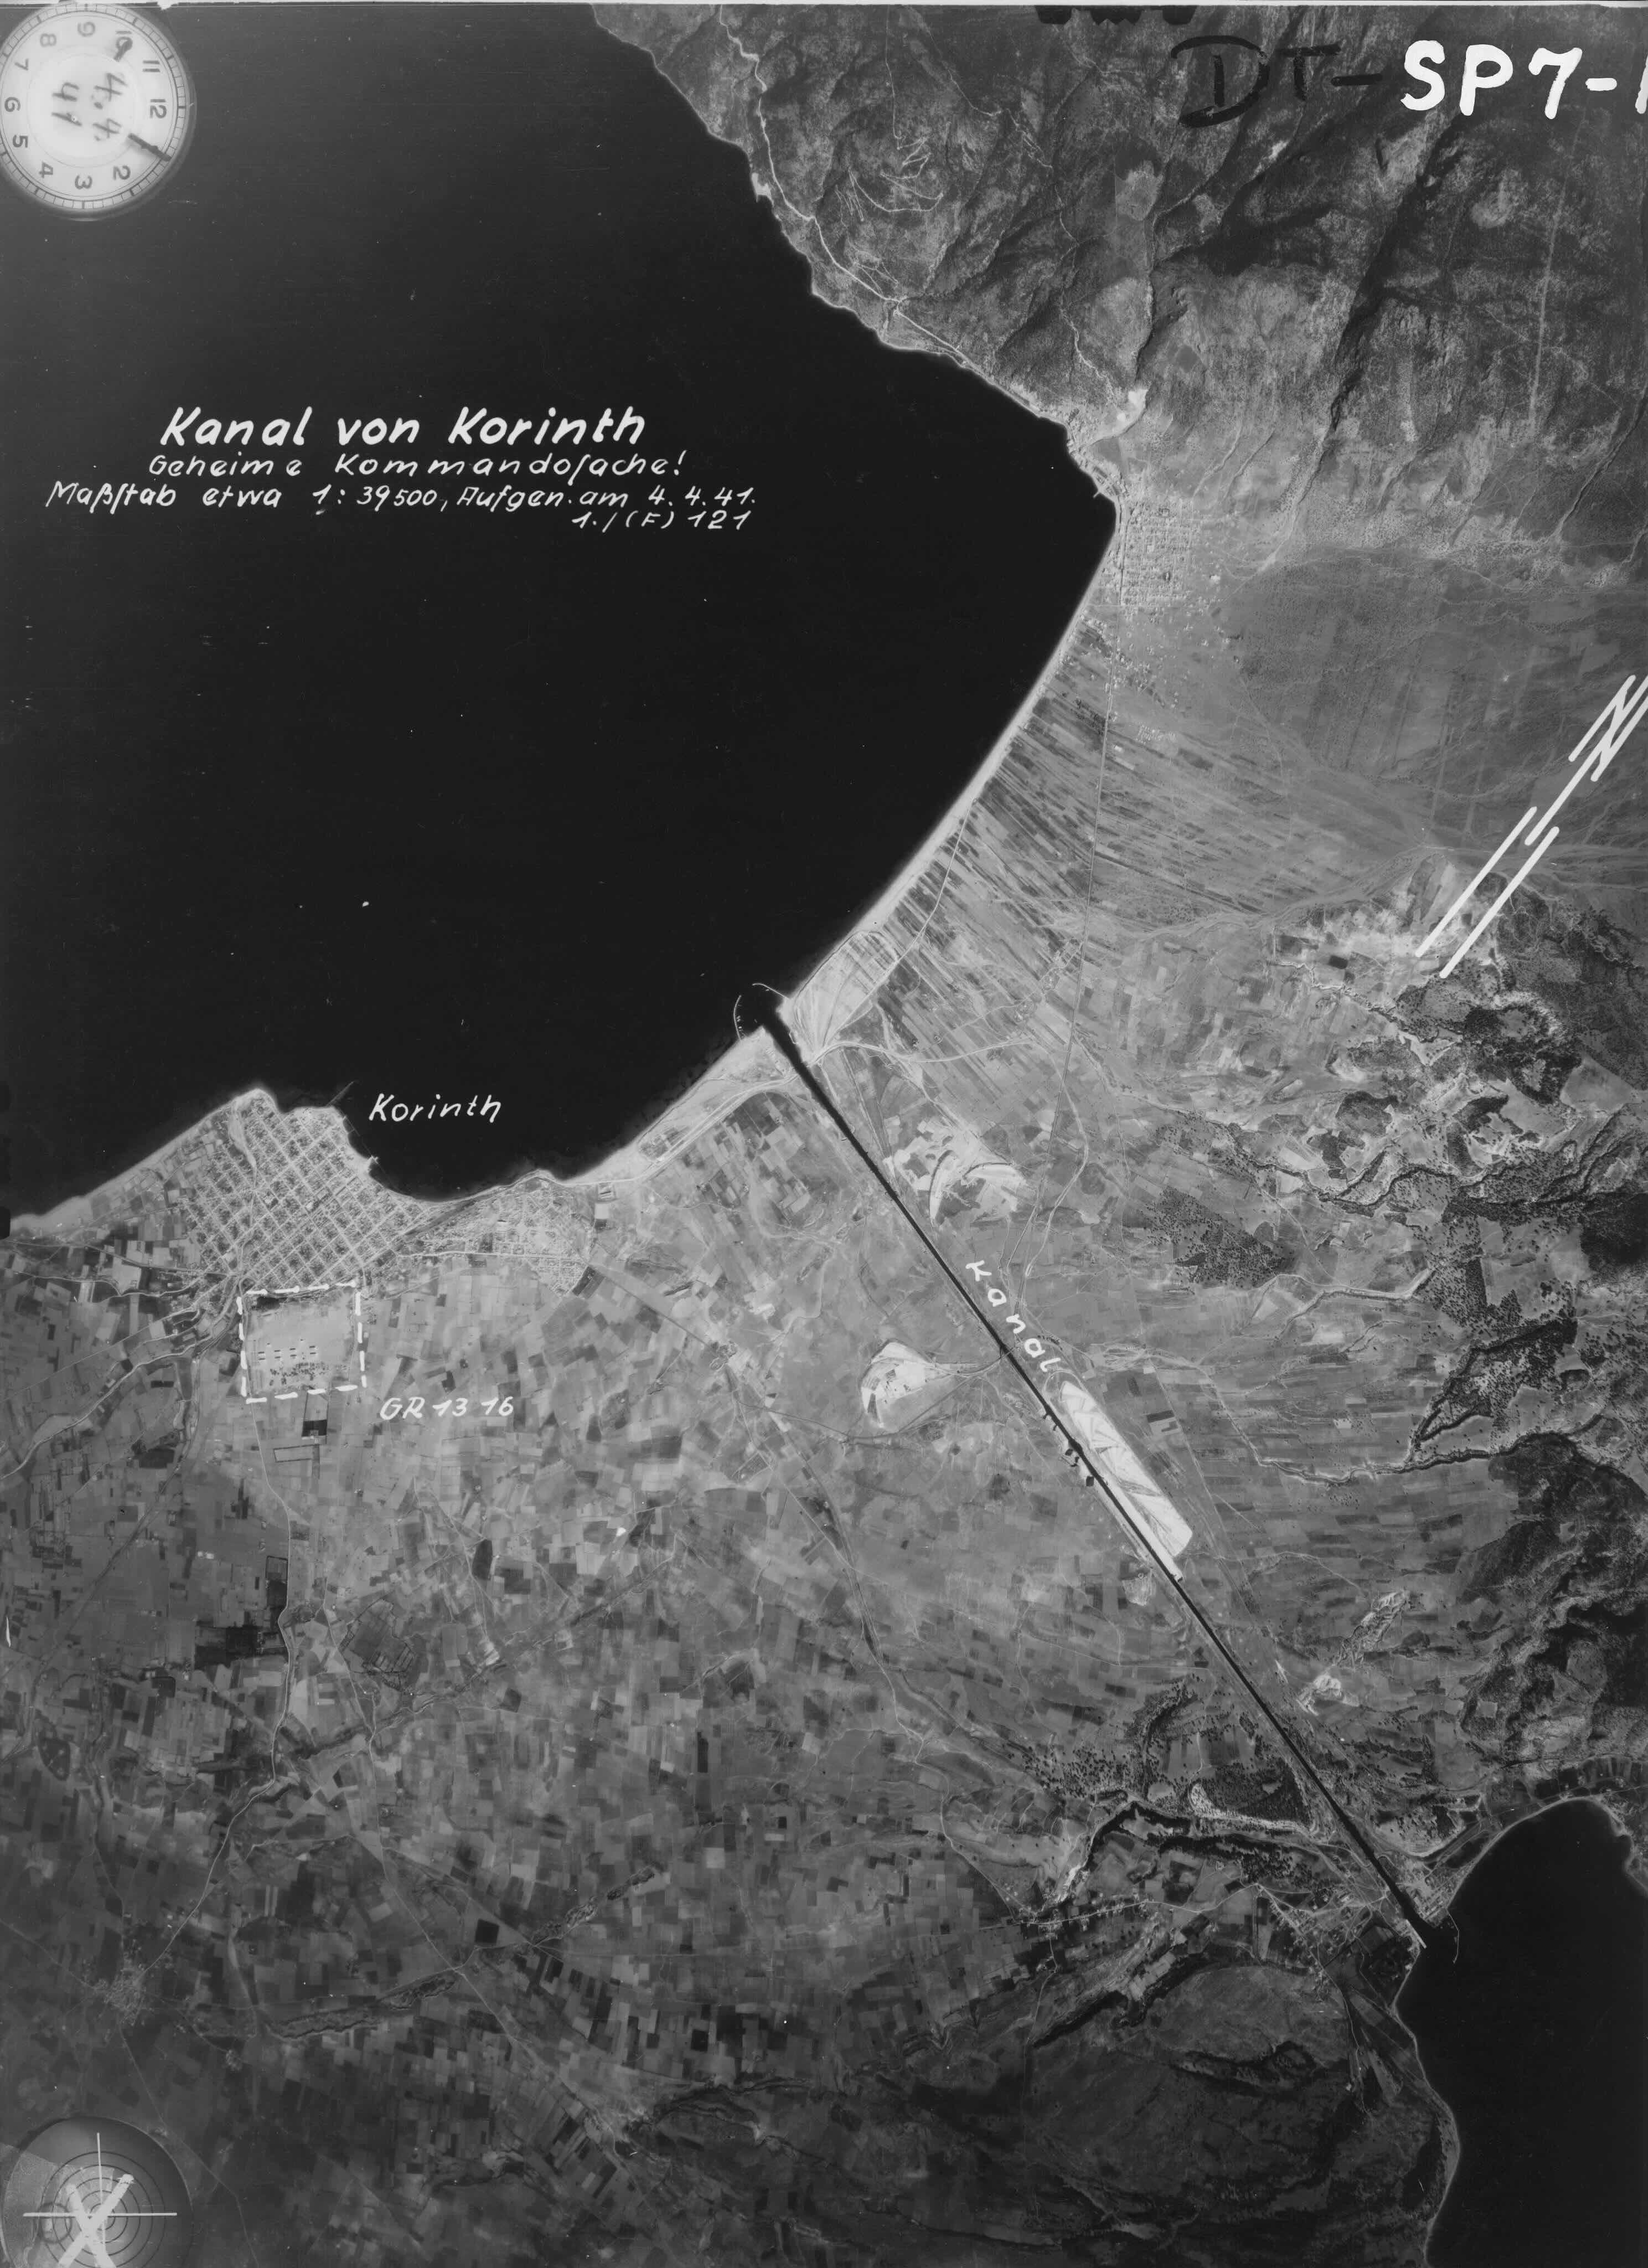
Platon Alexiades only discovered how significant the Corinth Canal was during the war when he was researching Allied submarine operations in the National Archives. He uncovered high-level declassified signals relating to a series of operations to block the canal, using both conventional forces and covert attempts by the Special Operations Executive.
The product of his research was Target Corinth Canal 1940-44, first published in 2015, which comprehensively details these attempts, conducted with assistance from the Greek Resistance. This is a tale of clandestine submarine landings, intercepted radio messages and probable betrayal, leading ultimately to arrest, torture and execution. It's the story of some very brave, determined men in a little-documented corner of the war.
The dramatic events of the 26th April, when the Fallschirmjäger, landing by glider and parachute, sought to seize the bridge over the canal, is just one episode in this long story.

On 22 April 1941, General Franz Halder, Chief of Staff of the German Army, recorded in his diary the discussion of a preventive airborne operation on the canal with General von Brauchitsch, Commander-in-Chief, German Army. The order would come directly from Hitler. This raised the fear that the Führer, whose mood was often erratic, might miss the critical moment.
Three days later, the order was finally issued for the operation to take place the following day. The task had been assigned to the 2nd Fallschirmjager Regiment from the 7th Fallschirmjager Division which was assembled near Plovdiv in Bulgaria. Already German airborne troops were being transferred to the aerodrome of Larissa, some 120 miles (200 kilometres) north of the canal.
ULTRA had revealed the content of the relevant messages and, in the late afternoon of 25 April, the First Sea Lord, Admiral of the Fleet Dudley Pound, sent the following signal to Admiral Cunningham:
INFORMATION RECEIVED SHOWS GERMANS WISH TO AVOID DAMAGING CORINTH CANAL. REPORTS ALSO INDICATE THAT IT MAY BE THE INTENTION TO SEIZE CANAL BY USE OF PARACHUTISTS TO ENSURE ITS SECURITY (A.l). IMMEDIATE ACTION SHOULD THEREFORE BE TAKEN BLOCK CANAL BY EXPLOSIVES FOLLOWED BY BLOCKSHIPS AS SOON AS POSSIBLE.
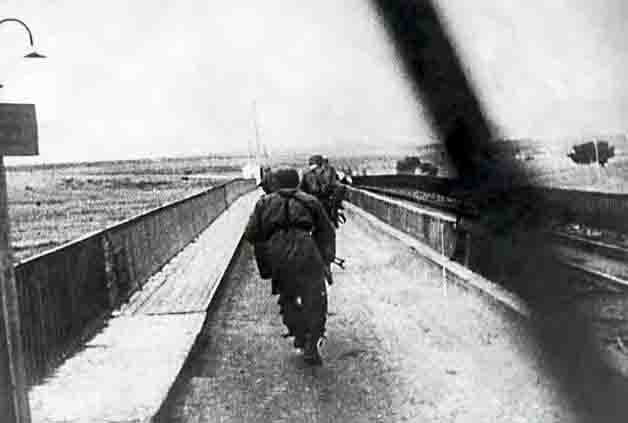
In the early hours of 26 April, in a foretaste of the Crete operation, some 800 German paratroopers, two battalions of the 2nd Regiment, known as Detachement Sussmann (from the name of its commander, Generalleutnant Wilhelm Sussmann), and other elements under the direct orders of Oberst (Colonel) Alfred Sturm, were dropped on both sides of the Corinth Canal (Operation HANNIBAL).
Following the devastating air raid on Piraeus, the Greeks had dispatched the T.40/39 anti-aircraft unit under engineer D. Nikolaoy (RHN) to protect the Corinth Canal. It consisted of three 88mm Krupp guns, two 37mm and two 20mm guns, but they were old and the morale of the gun crews was low; some of the men had already deserted. By the time of the air assault, Nikolaoy had only four men left but they were now reinforced by a British force, although the Greeks had little contact with them and only heard rumours that the bridge across the canal was to be destroyed.
This was the Isthmus Force which had been hastily created and put under Major R. K. Gordon of the New Zealand 19th (Wellington) Battalion. Most of the force had arrived only the previous day. It included 16 Heavy Anti-Aircraft and 122 Light Anti-Aircraft Batteries, the New Zealand Wellington West Coast Company of 19th Battalion, a squadron of 4th Hussars and part of an Australian brigade, which was to be relieved by a New Zealand brigade. They now came under fire first by nine Messerschmitt BfllO fighters and these were followed by many more fighters of the Messerschmitt BfllO and Messerschmitt Bfl09 types, which continuously strafed the British positions while Junker 87 Stuka dive-bombers dropped a number of bombs. It was estimated that eighty to one hundred fighters and twenty to thirty dive-bombers had taken part in the softening of the defensive positions.
One of the lessons learned was that it was necessary for defensive troops not to reveal themselves until the actual parachute drop occurred. There were no RAF fighters to interfere with the German effort and this was to prove decisive. The main opposition came from four 3.7-inch guns of 16 Heavy Anti-Aircraft Battery, situated some 1,500 yards south of the bridge over the canal. It was somewhat too far to defend it effectively and the buzzing Stukas diving and flying very low proved too fast for the guns to be trained on them. The anti-aircraft positions closer to the bridge were silenced one by one by the German bombers.
About half an hour later, six DFS-320 gliders carrying fifty-four men of the German 6./Fallschirmjäger Regiment 2 landed near the bridge. Three gliders landed on the north side and three on the south side, no farther than 600 feet from their objective and the nearest only a few yards from it. One glider was struck by a direct hit and fell heavily on the ground. The two platoons were under Leutnant Hans Teusen and Leutnant Haffner, the latter leading a team of engineers purposely sent to disarm explosives which the British might have installed.
Several were killed as their parachutes failed to open in time …
They quickly overwhelmed the British defences in the immediate vicinity. Shortly after, some 300 Junkers 52 troop carriers appeared and flying very slowly at an altitude of only 300 feet (90 metres) began disgorging paratroopers. Several were killed as their parachutes failed to open in time or were drowned in the canal. The Germans soon occupied the high grounds to the south of the canal; a few units were also dropped on the north side. This was a textbook attack, eliciting admiration from Imperial troops on the receiving end.
To Fred Woollams, who belonged to B Company of the 19th Battalion, the attack appeared surrealistic and brought to mind something from Things to Come by H. G. Wells. Major Gordon had established his headquarters at a small fir-covered hill some 800 yards northeast of the bridge with 11 and 12 Platoons of Wellington West Coast Company. After a sharp fight that earned it the name of ‘Blood Hili’ , the position had to be abandoned and the wounded left behind.
Woollams was himself hit in the leg but managed to limp away with a small group of soldiers. Like many of his fellow soldiers, he would be unable to reach an evacuation point in time. After being hidden by friendly Greek families for several months, he would eventually be captured as he tried to reach Athens on foot.
On the other side of the canal, the Australians were quickly overwhelmed and the tanks of 4th Hussars were obliged to withdraw.
The suddenness of the German attack had prevented Lieutenant Tyson from destroying the bridge with the explosives he had planted the previous day. One of the German gliders had landed very close to the fuse and it was now impossible to get close to it. Tyson had shared a foxhole with Captain J. F. Philipps of the Devonshire Regiment and they managed to slip away to a safe distance. Tyson suggested that since gelignite had been used a rifle shot might be enough to set it off.
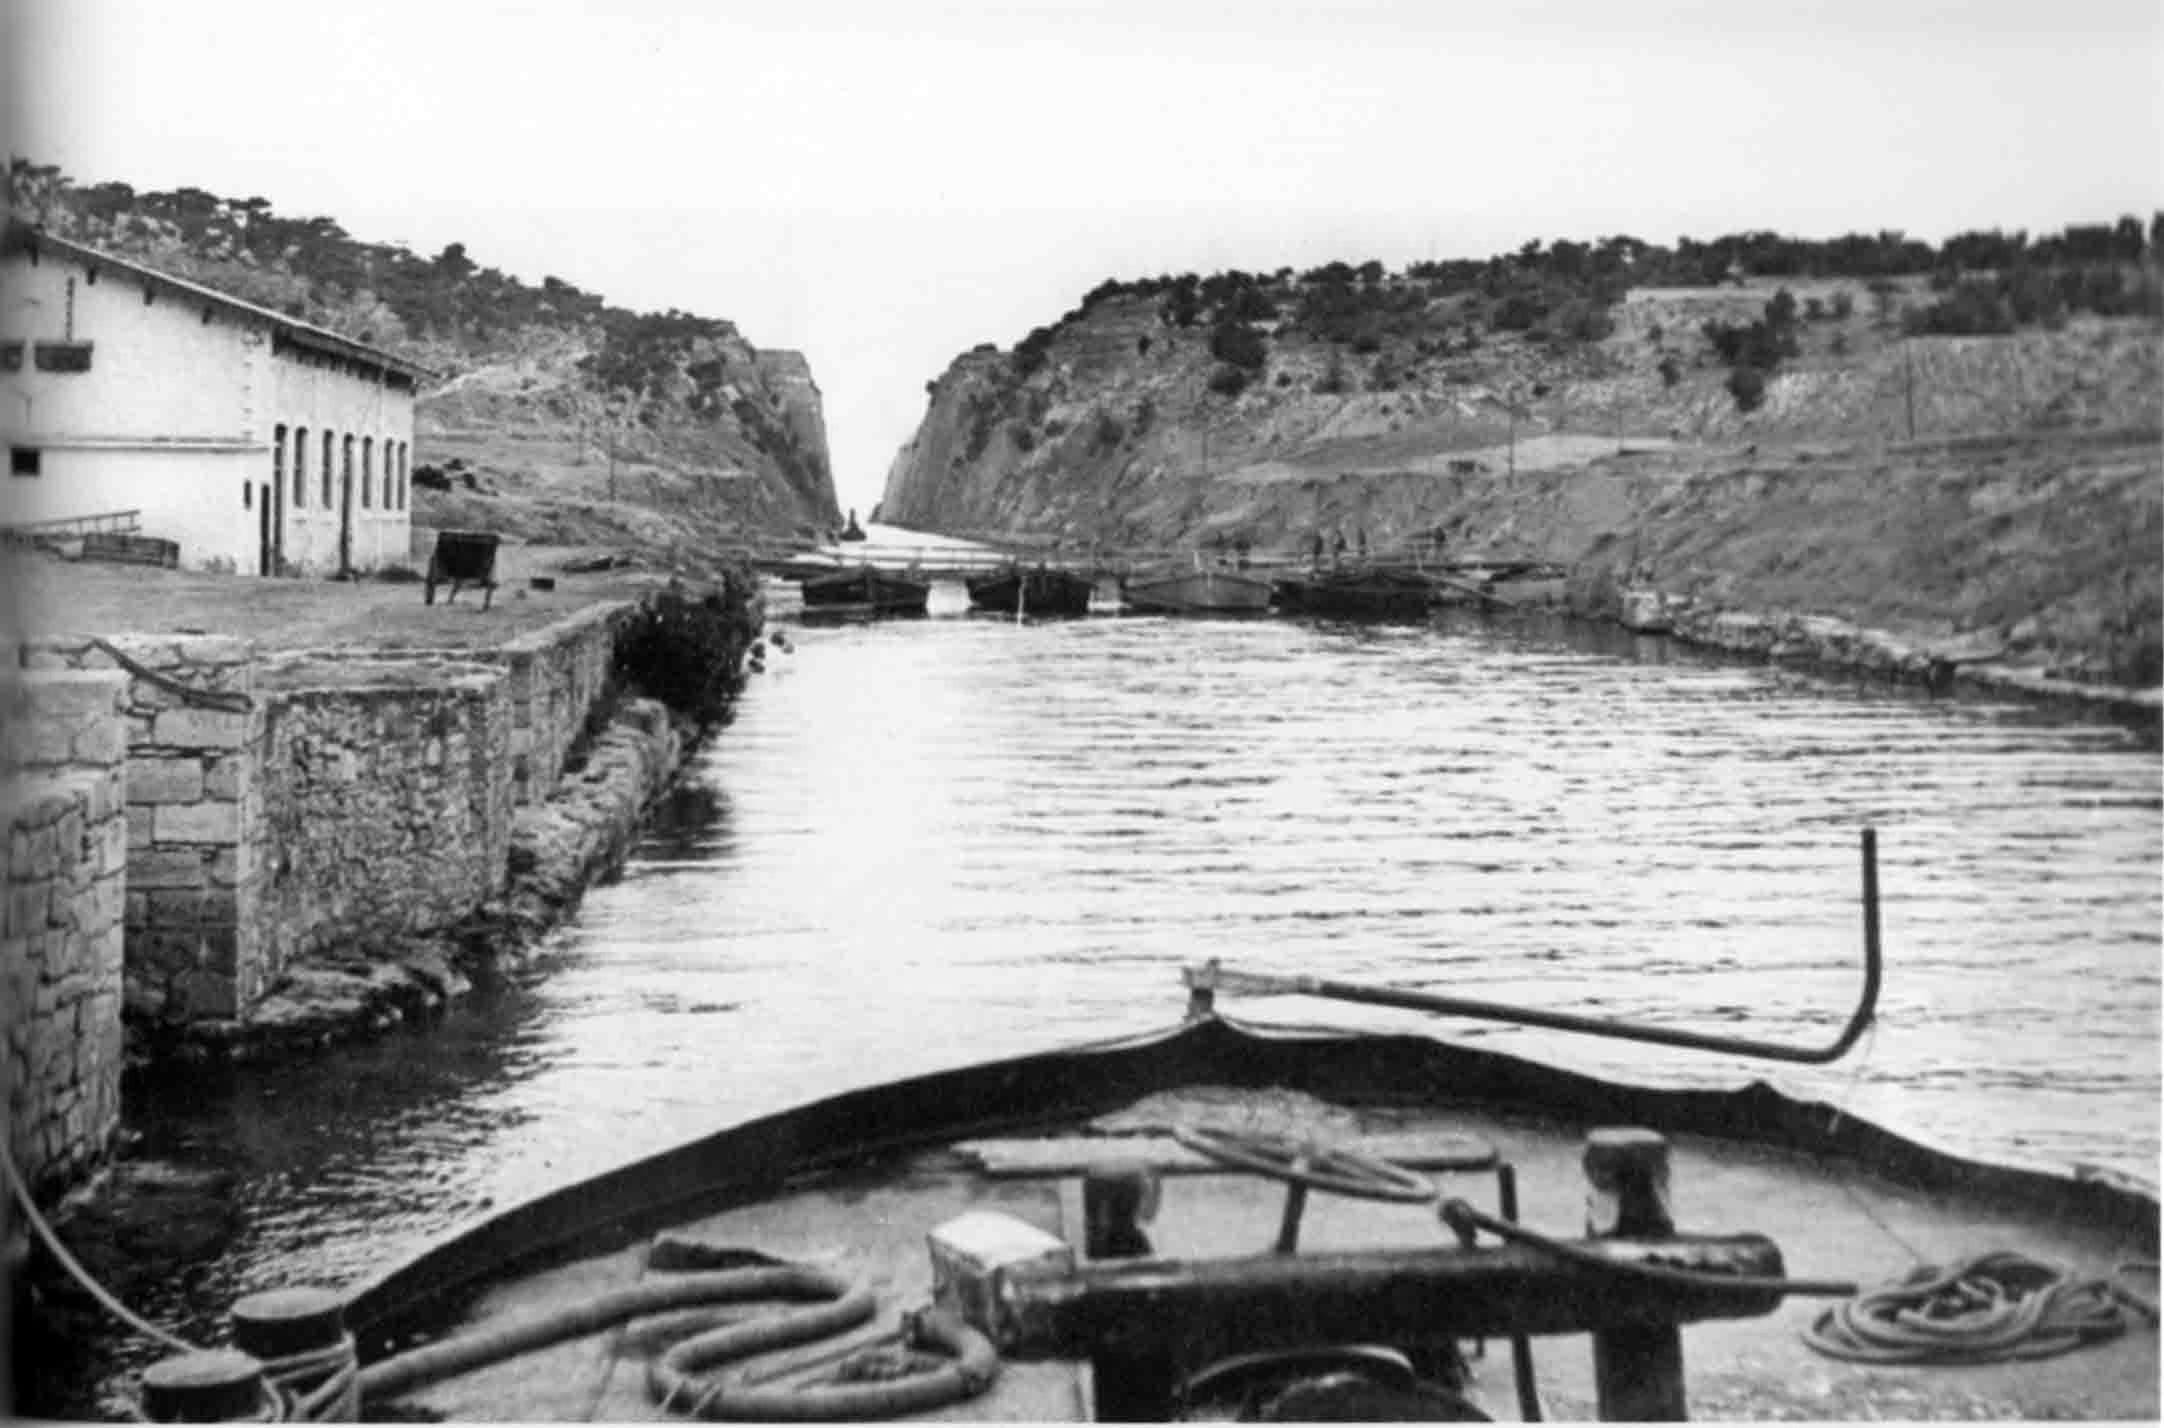
Philipps climbed up a bank and took a shot but missed. He came immediately under fire and had to crawl to a new firing position from where his second shot is credited with hitting the charges; the bridge blew up and collapsed, killing a dozen Germans. Leutnant Teusen, who had landed on the south side of the canal, had seen his engineers remove the explosives from the steel structure and pile them on the bridge. The photographer from the Propaganda Company, Ernst von der Heyden, had just joined them to take pictures for posterity when the explosion occurred. Aerial photographs timed it at exactly 0701 hours.
To his horror, Teusen watched helplessly as the bridge fell in the canal, killing von der Heyden and several of his men. The Germans would later believe that the explosion was caused by a lucky British anti-tank shell. The collapsed bridge would become the most serious obstacle to navigation in the canal.
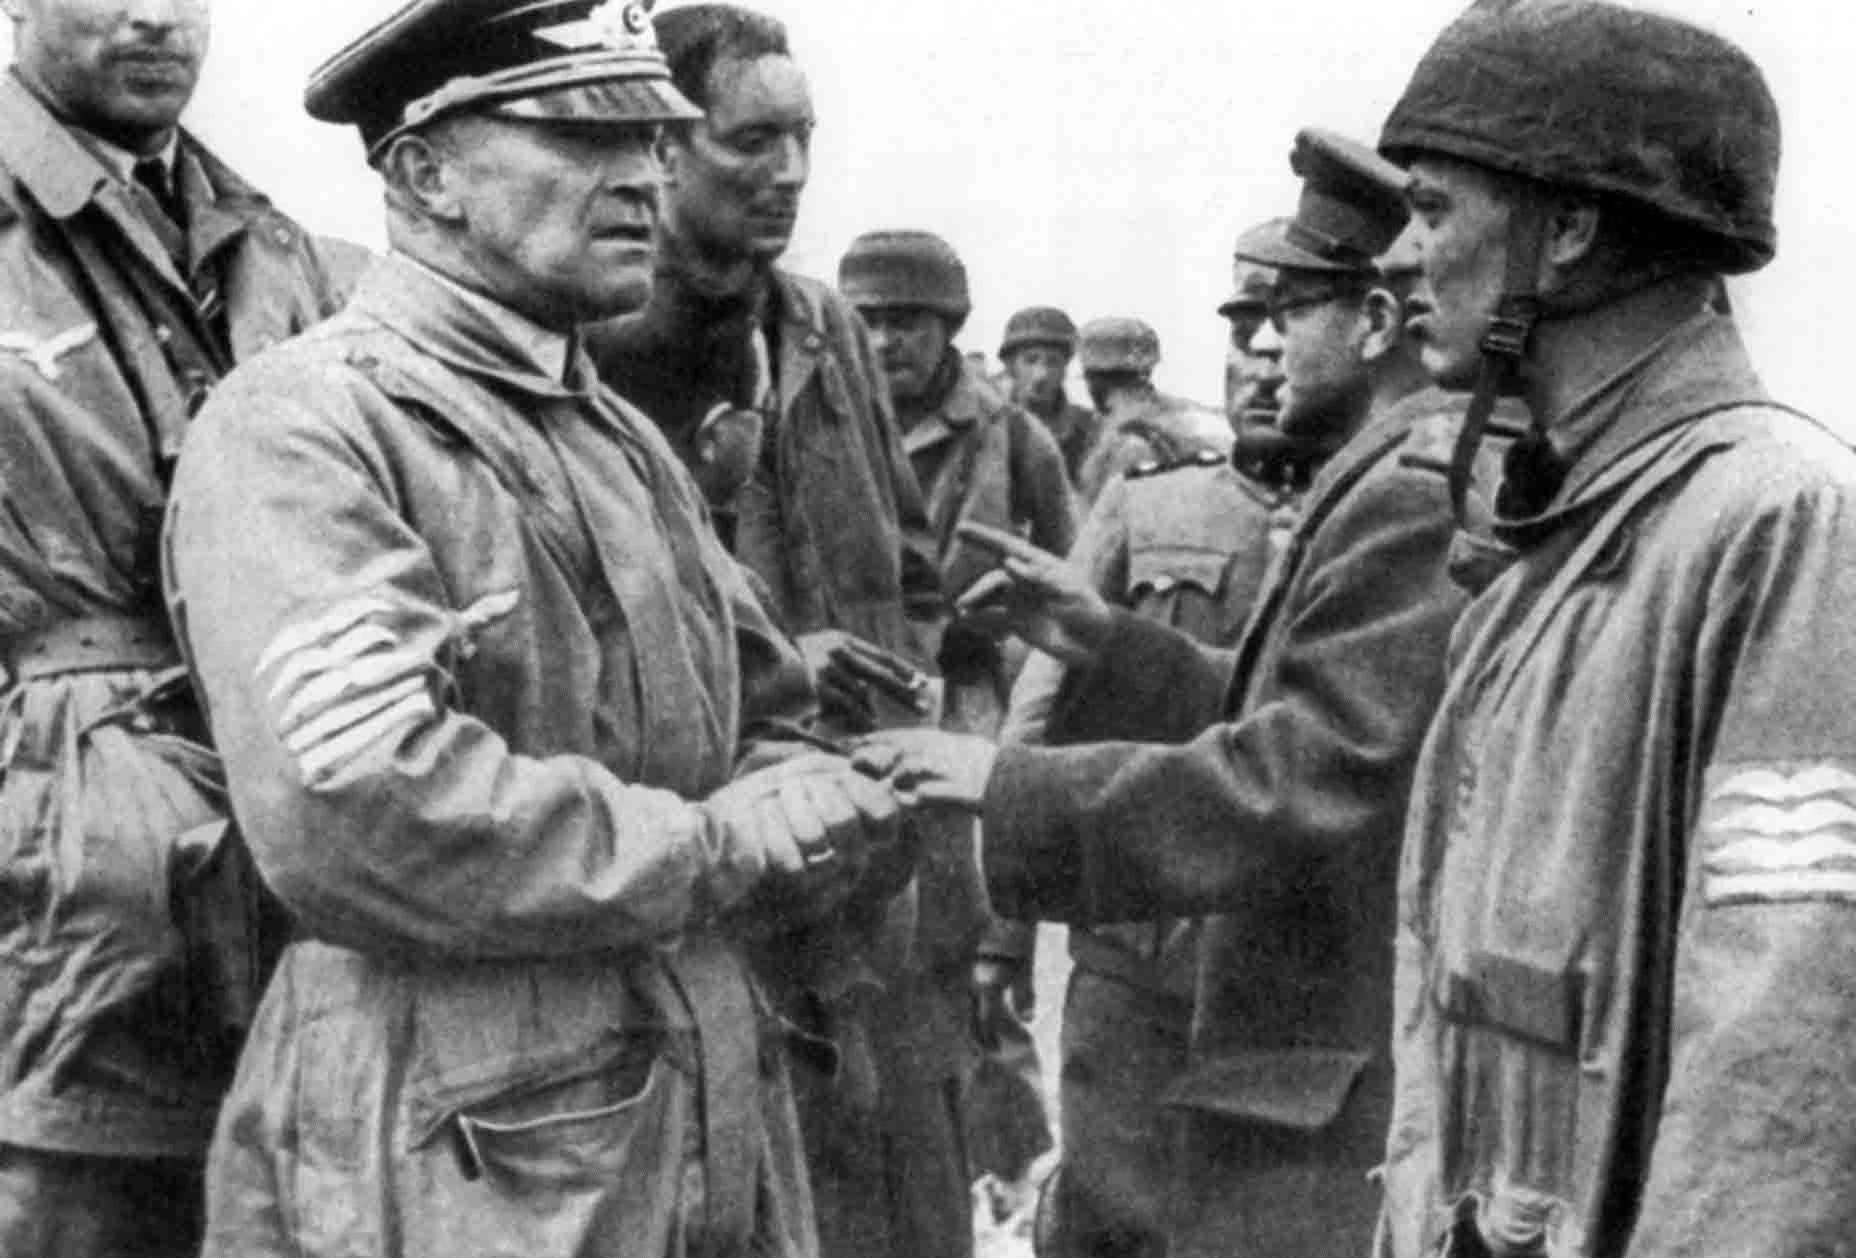
The cost had been heavy: seventy-nine paratroopers were killed or missing and 174 wounded, but the German sappers quickly built a temporary bridge. The capture of the bridge cut the retreat of British troops caught on the wrong side of the canal and many would have to surrender to the Germans. The paratroopers linked up with German Waffen SS reconnaissance units led by the hard-driving SS-Sturmbannführer Kurt Meyer.
The following day, German troops entered Athens. The temporary bridge allowed the 5th Panzer Division and SS Leibstandarte Adolf Hitler Division to cross into the Peloponnese and rush south. Their quick intervention would lead to the capture of 8,000 Imperial troops stranded at Kalamata as their reembarkation could not be organised in time.
© Platon Alexiades 2015, ‘ Target Corinth Canal 1940-44’. Reproduced courtesy of Pen & Sword Publishers Ltd. NB Not all of the above images are from this volume.

Affiliate Links
Recently on World War II Today ...

